|
|
|
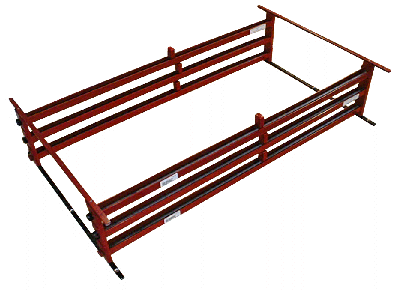
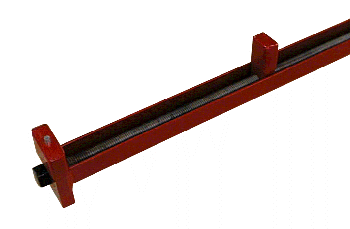
| Description The base component of the R & R system is the clamp itself which can be used pretty much the same way a pipe clamp could. The frame of the clamp is a U shaped channel. In this channel is a long threaded rod with a large rectangular "nut" that is actually what is applying pressure to the parts. On each end of the frame are fixed rectangular pieces, the threaded rod is captured in the frame by welded on nuts on the outside of the rectangular ends. The clamps can be used in a stacked system as shown here or individually as well. |
 |
 |
In Use While the clamps can be used individually, I believe the best use is in the stacked configuration. The exact numbers and size would be determined by your own needs. In a stacked system the space needed is reduced, the only caveat is that some sort of protection may (as in I recommend this) be needed between layers of clamps to keep the glue drips from getting on lower panels. A piece of cardboard or newspaper serves this function well. |
If one would want to use the R & R clamps on a work bench or some portable platform, the 24" models would probably be enough capacity and easier to handle generally. There are 12" models also, I believe these could be useful in some special application but would be too small for general purpose work; even if you only have a 12" planer, the glue-up are often larger than this. The clamps used for this review are the 36" long models; this length is a good size to use individually or in a more dedicated clamping station. There are plastic covers on the two clamping surfaces to keep from marring the panels. Since the thread is open, glue can drip down onto it and dry. When the nut is run across the dried glue it pops right off though, it doesn't cause a problem. When used without the lower positioning strips, the clamps exhibit the typical "torque" effect (clamp rotation upon tightening) to a greater degree than typical pipe clamps. When the strips are used, the torque effect is greatly reduced. The clamps also have the typical "bow" when tightened, in this case it is a bow in the screw, not the clamp frame. The bow is less than the small bar clamps and probably about the same as 1/2" pipe clamps. |
|
| Note the pin sticking out of the top
of the end piece. This pin will fit into a hole of a clamp stacked onto it. As
stated previously, the R & R design is a system. The other parts that make up
the system are a set of lower and upper positioning strips and some driver
accessories. The lower strips can be screwed into a platform of your own making if
desired; the upper strip stabilizes a stack. The pin on the clamp bottom will fall into holes in the strip to keep it in the proper position but also allow removal or re-location as needed. Notice that the red-nutted clamps have a pin in both the upper and lower ends for the proper stacking sequence. The clamps can be operated from either end. |
 |
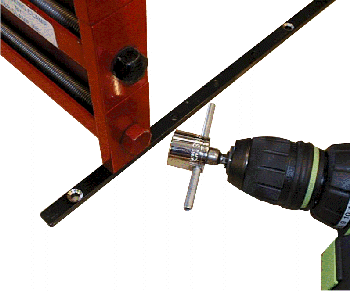
The thread pitch of the clamp is somewhat fine compared to many clamps. The maker offers a 3/4" socket with a rod for finger tightening (shown above). There is no reason you cannot use any other 3/4" socket and driver to utilize the clamp though. The accessory the maker offers works fine and is small compared to other methods such as a ratchet or wrench. I think you'll find however that to be efficient a drill is the best way the skew the clamp nut into position.
In the interest of full disclosure R&R Clamp provided this product to facilitate this review. |
|