|
|
|
Shop Tour
 |
 |
 |
 |
 |
 |
 |
| My woodworking shop is located in a detached outbuilding. Overall it is almost 1800 square feet which includes some dedicated storage areas. It also includes a large walk up attic area of about 800 square feet which will have an office at the North end but this attic is mainly storage for all sorts of stuff. For additional information on the actual build, see my Building a New Woodworking Shop page. |
 |
| Printer friendly Layout |
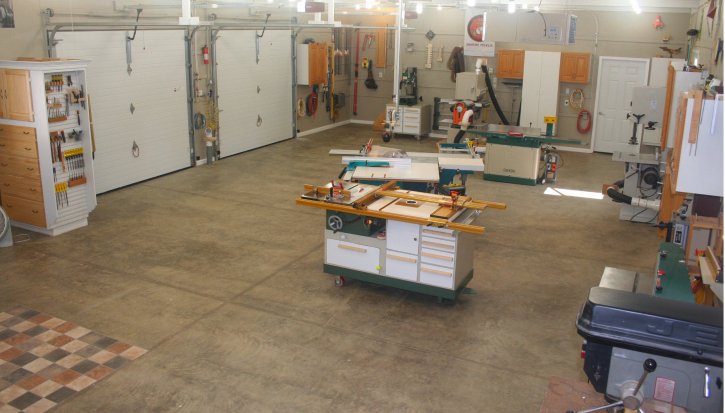 |
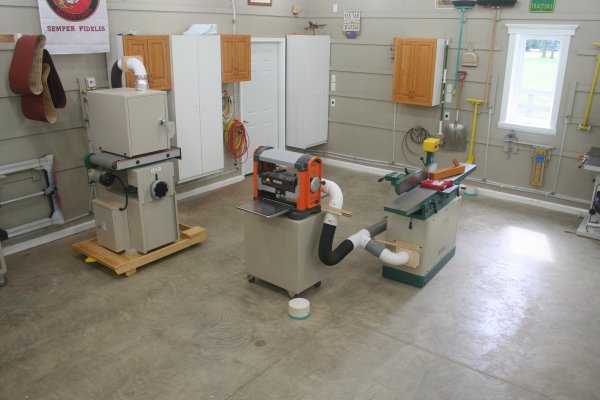
| This is a view looking South.
There are two general areas in the shop proper and what is mostly seen here is the
"machine area". This is where the two tablesaws, two router tables,
jointer, planer, wide belt sander, and bandsaw live. There is a rather largish open
area in front of the two overhead doors for material and assemblies needed during a
project. This is also flex space where other tools might be rolled in as needed. Although not clearly evident, two of the major design goals for the shop are fulfilled here. I wanted to have the ability to walk up to any of the major power tools and use them without having to move them into position or hook up electrical, air, or DC connectors. Since these tool groups are located out in the middle of the shop, there are conduit, air line, and DC pipes run under the concrete to them. The other major goal fulfilled is basically to have a lot of free area to work in. |
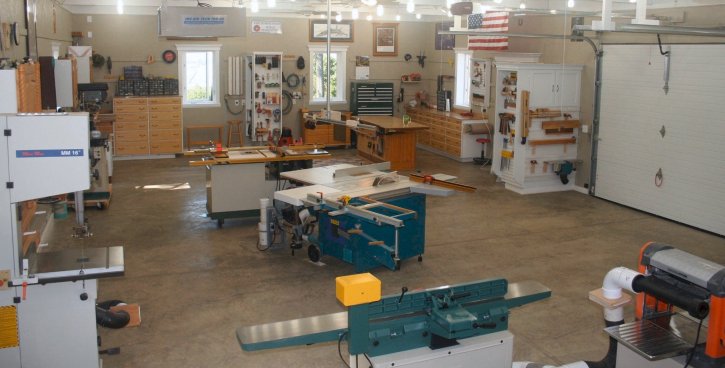 |
| This is a view looking North towards the "bench area". Past the saws is a large open area primarily used for assemblies. There is a single main workbench flanked by a wall mounted clamp to the left and a tall cabinet primarily used to store power tools. The main entry door is also at this end of the shop. The two Northern windows look out upon a nice view of the Illinois River valley. |
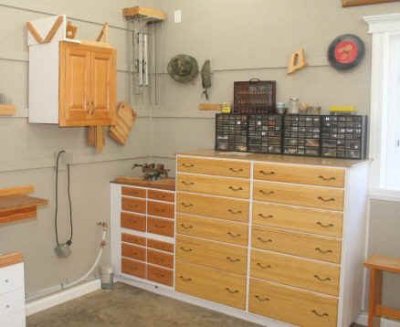
| In the Northwest corner of the shop
I have some bulk storage for boxes of screws, small jigs, project supplies, seldom used
tools and other stuff. All these are what I would call "medium use" storage; stuff I don't need all the time, but stuff I don't want to have to walk too far to get. That last bit is one of the realities I've noticed in this shop compared to my old one, walking distance can be a factor - nice problem to have I guess. The lowest cabinet in the corner is re-purposed from something else and works out well since it allows a little extra room for any extremely long material to the right of the drill press. |
 |
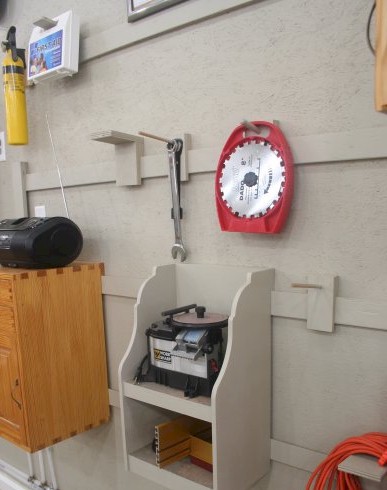 |
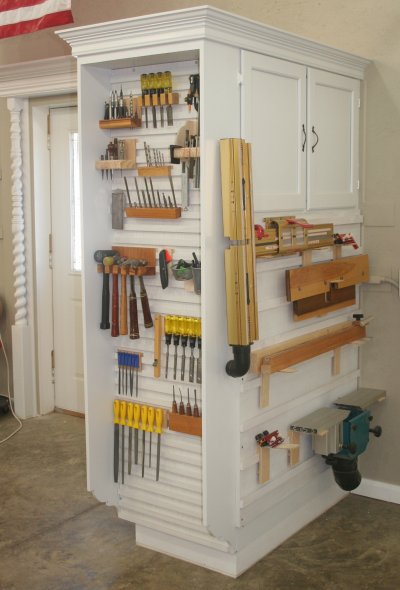
The view above and this closer one
shows the French Cleat system
put to use. I used this system in my previous shop and incorporated into this one as
well. All of the wall cabinetry is hung by this. This allows them to be moved
quite easily should the need arise. In addition, I have several different types of cleat based holders for all sorts of things. These are usually simple scraps of plywood with a dowel or other type of device installed to hold an object. While I had the spray gun out one day I decided to paint these little holder deals the same color as the wall. This helped remarkably to make these things virtually disappear into the wall. The cleats on the wall are just strips of plywood cut at a 45 degree angle on the top and screwed to the wall with 3" screws. All told, I cut up 3 entire sheets of 3/4" plywood to get enough material to run the cleats around the walls at various heights. I could have easily found a place for a 4th sheet worth of material. There are several rows of cleats spaced at different heights for flexibility. You can probably tell here I sheathed the interior walls on OSB and painted them a light neutral color. |
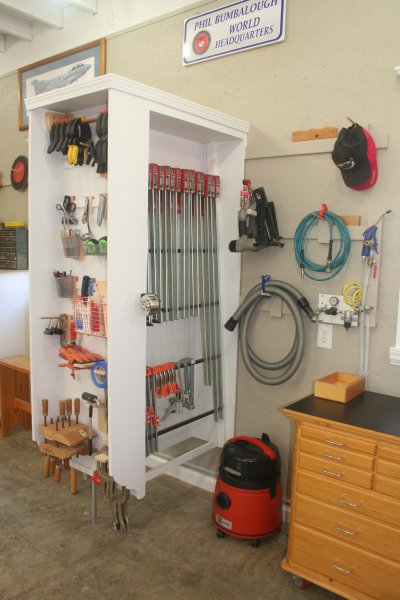
| Of course no woodworking shop would be
complete without a bunch of clamps. I had originally intended to build a mobile
clamp rack but the deign kind of morphed into this instead. This unit is attached to the wall with the French cleat system described above. I held it off of the floor for cleaning purposes and since doing this made the unit have a large cantilever there is a small "foot" at the end to offset that. The "foot" is a small aluminum leg screwed to the unit. The cabinet itself is comprised of two units, the "rack" and the end piece which holds several small hand clamps and other items. I made this entire unit of this out of scrap materials and painted it white to make it look decent. The "rack" is an old hollow core door flanked by a couple of pieces of plywood. There are some angled cleats attached to the plywood which hold some half inch black pipe upon which the long clamps rest, the pipe is removable and spaced strategically to match the clamps I own. The end piece is very simple but incorporates a miniature version of the French cleat system to hold all the items on it. I have several types of clamps, I tend to prefer the K-body style so that is what is nearest the bench. |
 |
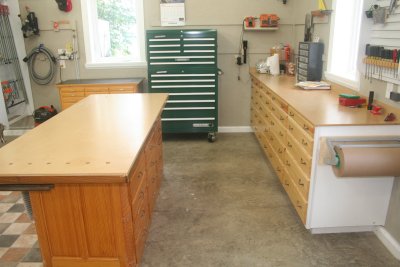 |
Rotating right from the clamp rack
is a small mobile drawer unit I originally intended for a small metal lathe. It
holds a lot of odds & ends. To the right of it is a traditional mechanics tool
chest I got at Menards. This holds most of my non woodworking hand tools like
wrenches, sockets sets & whatnot. I plan on outfitting the drawers in this with
custom tool holders at some point. To the right of the bench is a counter with a row of drawer units. These hold a variety of things that are more frequently used than the "bulk" items on the wall opposite. The counter serves as my "sacrificial horizontal surface. basically a place to set stuff somewhere besides the workbench. |
| Also above is a shot of my main workbench. I originally had the vise on the drawer side of the bench but moved it to the other side since that's where I found myself working most of the time. In my old shop, this workbench held a variety of things simply because it was the only significant drawer storage unit in the space. It's slowly being relegated to storing only woodworking tool related items. More detail on the bench can be found on a web page dedicated to it - no, there are no plans available for this - I get asked that a lot. | |
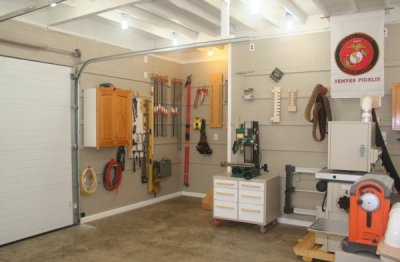
| In my previous shop I had two high
mounted wall cabinets to store several of my power tools in. I didn't really like
that, it seemed like tools were often on top of or blocking access to other tools so I
decided that storing these things in drawers would be a better way to go. I also discovered that I was running out of wall space in my huge new shop. to help solve that, I decided that I would create a little bit of "extra wall" space with a large peninsula cabinet. Not shown are a series of five drawers with full extension slides to hold all my most commonly used power tools like drills and routers and such. At the top of the cabinet are some door units, two sets of doors on either side. The south side has a large area with a small French cleat system to hold various jigs and accessories associated with the tablesaws nearby. The end of the peninsula is where I have most of the highly used tools, ones that I don't even want to have to open a drawer or door to get to. In my old shop these types of things were on peg boards and that's what I had originally intended to do here. I have had such good luck with the cleat system elsewhere I decided to scale it down for this and it works great. To the left of the entry door is another small tool holder cabinet. |
 |
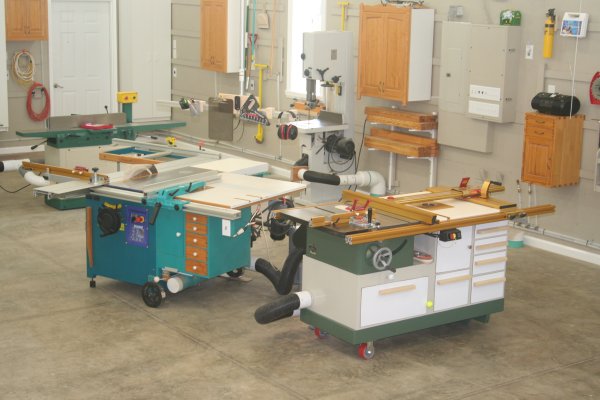 |
| The tablesaw tends to be the core
power tool of a woodworking shop and mine is no exception. To the left I have my
trusty Hammer B3 12" tablesaw / Shaper with a 76" format type sliding table.
I also have a router station in the right extension wing and a folding power feeder
for the shaper. This my main saw and gets a lot of use. I have modified this
tool quite a bit, more of that info can be found here. The machine on the right is a standard contractor type saw with a custom mobile base including a router table setup and a high end Incra rip fence system. I usually run this machine with Freud diablo 7 1/4" circular saw blades instead of typical 10" blades. These blades are a GREAT value. Their thin kerf is a better fit for the machine and they are so cheap it isn't even worth sharpening them. They do not have the same cutting depth as a 10" blade but are adequate about 98% of the time; besides, if I need more depth, I just use the 12" saw. This contractor saw tends to be used when quick cuts are needed, sheet goods and other larger jobs tend to be cut on the 12" saw. Why two tablesaws one might ask. First, I don't NEED two saws, it's a luxury. Having two saws is nice though and I find that these two compliment one another nicely. Here's how; one saw tilts right, the other one tilts left. The Hammer doesn't accommodate a dado cutter, the other saw does. The Hammer doesn't accept common jigs like a tenon jig, the other one will. I can also set the machines up for separate operations at the same time. |
| Over the Hammer B3 is a large T-bar
suspended from the ceiling. I use this to hold several items such as safety glasses,
a tape measure, a clipboard for plans, a push stick and some ear protection. Suspended freely above the saw means all these items are centrally located and easy to find. This is a big improvement over having these items laying on the extension table or mislaid elsewhere. I also keep my shop-made DC remote control switch (fob) here. I glued small magnets to the back of this so it's easily attached to whatever machine I'm using. |
 |
 |
| Back towards the southern end of the
shop are the jointer, planer, and wide belt sander. All of these tools are on mobile
bases. Typically in a shop of this class a portable planer such as the one shown is
replaced by a large 15" professional model. I actually like this small
"portable" unit because of the lower cost and rubber infeed / outfeed rollers.
The cabinet the planer sits on is re-purposed from something else but turned out to
be exactly the right size for this application. There are two drawers in the cabinet
and a large open area in the bottom filled with two heavy sand bags to make it a bit more
stable. The jointer is an 8" model with a 76" bed, plenty big enough for over 99% of the stuff I work with. This is basically a copy of the Delta DJ20 with parallelogram beds which make it easy to adjust. I had considered going to a 12" model when I upgraded from my 6" unit but decided that it wasn't worth the extra cost for me; I hope I don't find myself upgrading in the future. The "big box thing" to the left is a 15" open end wide belt sander, another reason I don't feel the need for a 15" planer. This isn't something typically found in a hobbyist shop, it replaces a 16/32 drum sander and is a considerable leap forward by comparison. It is also the only tool that requires compressed air to operate; it's used to control tracking and belt tension. Since this tool was part of the original shop plan, I ran a dedicated wire and circuit to serve this one tool. Notice that all of these tools are hooked up ready to use on a moments notice. There's plenty of space for materials or a parts cart without interfering with anything. These are two of the major differences between my old garage work shop and this current one. The door leads to the tractor bay where I have some additional storage and other systems. |
 |
On the wall over towards the stairs
leading to the attic are carpentry, electrical and other tools / things including some
1/2" bar clamps. Also seen here is a small metalworking mill. This isn't something found in most woodworking shops. I typically use it as a drill press because it has electronic variable speed, something my other drill does not. It has a cross slide and a tilting head. Half the reason for having this tool is to do a little metalworking associated with woodworking jigs and such. It could be that in time this machine will replace my old standard drill press. |
 |
| On the other side of the shop wall on
the South end is what I call the "tractor bay". In addition to being a
heated space for my little green
monster during the winter, it houses my air compressor, dust collector, heating
system, lumber storage, and whatever else might find it's way there. The tractor bay
is serviced by it's own overhead door. I didn't bother to paint the walls in here and I use some lower quality CFL bulbs here as well so the lighting isn't as good as in the main shop area. One major reason for creating this walled off area is to provide noise isolation for the dust collector and air compressor and it performs this function quite well. I didn't go to any special lengths here, it's just a stud wall sheathed with OSB on both sides. Wit the entry door closed and DC running, the noise is considerably reduced in the shop area, this was another major design goal of the shop. There is a rather large walk up attic space above and to help get things up and down I installed a hoist and made a platform for it. In the ceiling of the tractor bay there is a cut-out for this. |
 |
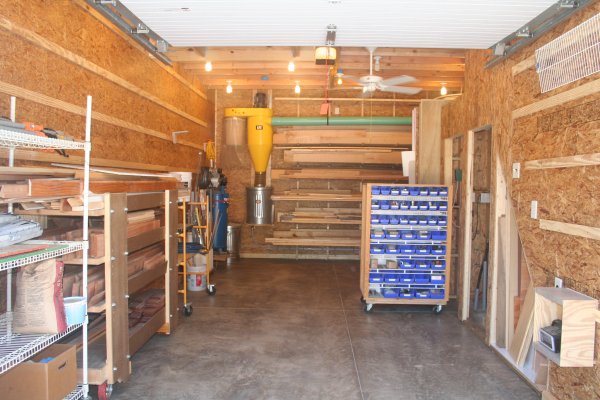
Here are some closer views of lumber
rack including the cyclone dust collector. The lumber rack is made of 1/2"
black pipe set into angled holes drilled into studs. These are also sleeved with PVC
pipe to prevent marking the lumber. These make for a very study rack and it easily
supports the load shown here. Note also how the 6" PVC pipe for the dust collector exits the floor and runs high overhead to accommodate this storage and give a long straight run into the cyclone. I had originally intended to build a large rolling bin for the DC but I think a couple of trash cans are actually easier to handle. The cyclone is a repainted 2hp Woodsucker unit which is no longer made. This 2hp unit works well, I'm surprised that I am able to get away with something this small. |
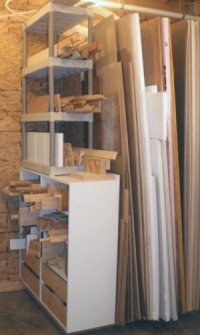
| The sheet goods rack has dividers made
in a similar fashion to the lumber rack. This rack is basically a platform with the
heating room constraining the right hand side and this re-purposed cabinet holding offcuts
on the left. My original thought was to store sheet goods on edge where the lumber
rack is above but storing them on end takes advantage of my high ceilings and I think
sheet goods are actually easier to manipulate on end like this. The rack shown here is primarily for full length sheets, other smaller cut-offs are stored in an open triangle area underneath the stairs in this area. I haven't maxed out my storage area yet, the goal is not have too much in the way of sheet goods, lumber is another story. If I were doing this again I would definitely go with the on end type of storage for sheet goods but the horizontal lumber rack is another story. It works okay for stuff you don't need to get to much but it isn't the best for sorting through, I think a vertical rack serves better for this. Ideally, both styles have their place, one for maximizing space, the other for ease of viewing. |
 |
| That's about it for a tour, again, I
have more detail on the design and construction
in separate pages. My shops are always evolving and as this one does I'll update
these pages. If you have any questions, feel free to ask. |
 |
 |
 |
 |
 |
 |
 |
 |